Chicken Coop Insulation and Winterizing: A Complete Guide
Affiliate disclosure: Some links on this page are affiliate links. If you buy through them we earn a small commission at no extra cost to you. Recommendations are research-driven; we don't claim personal use of every product reviewed. Product prices and availability are accurate as of the date published and are subject to change. Always check Amazon for current pricing before purchasing. Learn more.
Quick Picks
EconoHome Reflective Insulation - 24in x 10ft, 3mm Foam Core, Aluminum Heat Shield - Light Reflective Insulation for
3mm foam core provides lightweight insulation without excessive bulk
Buy on AmazonVermont taught me about cold the hard way. The flat-pack coop I built my first year didn’t survive the second winter intact, and that failure cost me more than lumber. Six years later, I’ve learned that insulation isn’t optional in serious cold, and neither is understanding the difference between keeping birds warm and keeping a coop dangerously sealed.
Chicken coop insulation and winterizing covers a wider range of decisions than most first-timers expect. You’re balancing heat retention against ventilation, moisture control against draft prevention, and material safety against budget. This article works through the key considerations and one solid product worth knowing about.
Why Coop Insulation Matters More Than Most Keepers Realize
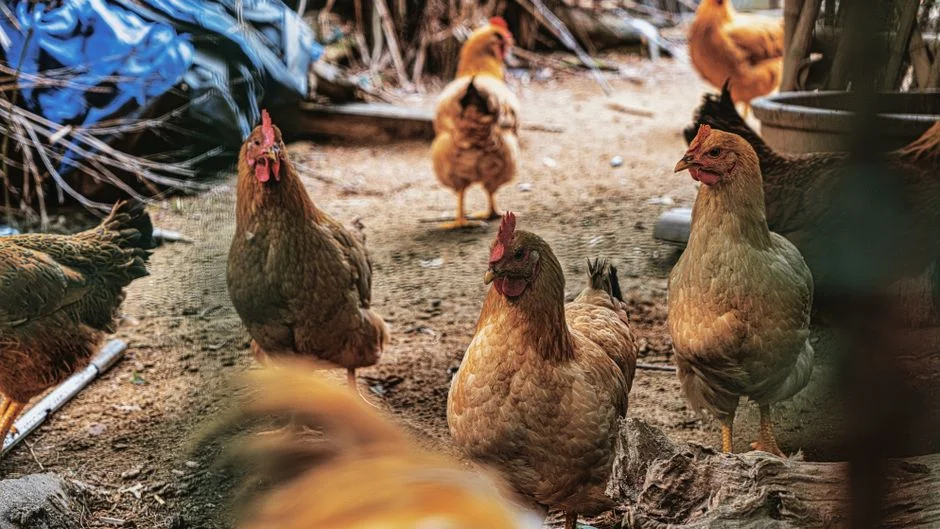
A chicken coop in winter has one persistent enemy that isn’t cold: it’s moisture. Chickens exhale a significant amount of water vapor, and their droppings add more. Seal a coop too tightly without insulation that also supports proper airflow design, and you end up with condensation on walls, wet bedding, and respiratory illness in your flock. I’ve hauled water twice daily in January when my flock hit fourteen birds, and I can tell you the moisture inside that coop on a below-zero morning was visible on every surface.
The goal of insulation isn’t to make your coop a sealed box. It’s to raise the ambient temperature enough that your birds’ own body heat can maintain a livable environment, while you preserve the ventilation that keeps air quality safe. Those two goals exist in tension, and getting them right is the actual skill of winterizing.
For more on the full picture of environment and protection gear for your setup, the hub covers the broader category decisions worth reading before you buy anything.
Understanding Heat Loss in a Chicken Coop
Where Cold Gets In
Heat escapes a coop through three main mechanisms: conduction through walls and roof, convection through gaps and vents, and radiation from warm surfaces to cold ones. Most budget coops, especially the flat-pack variety I’ve now retired from considering, address none of these deliberately. Thin plywood conducts cold efficiently. Gaps around pop doors and rooflines allow cold air to circulate at bird level. And uninsulated metal roofing radiates warmth out of the coop as fast as your hens generate it.
Identifying which mechanism is causing the most heat loss in your specific coop is the first step. A coop with solid construction but a thin roof needs different treatment than one with good walls but a poorly fitted door. Walk around your coop on a cold morning and look for frost patterns. Frost forms heaviest where the temperature differential is greatest, which points directly at your weak spots.
Ventilation vs. Draft: The Distinction That Matters
Ventilation is airflow placed above the birds, usually near the roofline, that allows moisture and ammonia to escape without creating a wind chill at roost level. Drafts are airflow at or below bird level, moving across roosting bars or the floor, and they are actively harmful in cold weather. Any winterizing strategy has to preserve one while eliminating the other.
When you insulate, think about what you’re closing off. Adding insulation to walls is straightforward. Plugging every gap you find is not always the right move. If you seal the coop too thoroughly and reduce ventilation below an adequate threshold, you’ll see frostbitten combs from moisture accumulation faster than you’d see them from cold air moving through a properly placed upper vent.
Reflective Insulation vs. Batts: What Works in a Coop
Fiberglass batts are the standard residential insulation choice, but they carry real risks in a coop context. Chickens will peck at exposed insulation. Fiberglass ingestion is a serious health hazard, and covering batts with a hard surface inside the coop adds cost, weight, and installation complexity. Foam board avoids the fiber issue but can also be pecked through if birds access it.
Reflective insulation occupies a practical middle ground for many keepers. It’s thin, can be installed flush against walls or under roofing with minimal dead air space, and doesn’t present the same ingestion risk when properly secured. It works primarily by reflecting radiant heat back into the coop rather than slowing conduction, which makes it especially useful on roof undersides and exterior walls facing the prevailing wind.
Top Picks
EconoHome Reflective Insulation 24in x 10ft, 3mm Foam Core
The EconoHome Reflective Insulation is a mid-range reflective barrier built around a 3mm foam core sandwiched between two layers of aluminum facing. Spec data shows the foil layers reflect radiant heat back toward the source, which in a coop means reflecting the warmth generated by your birds back into the space rather than allowing it to bleed through the wall or roof surface.
The 24-inch width and 10-foot length give you a workable roll for a standard backyard coop. Owner reports indicate it cuts well with heavy scissors or a utility knife, staples or tacks cleanly to wood framing, and sits flat without the spring-back you get from thicker foam board. For a small to medium coop, one roll will cover a meaningful portion of the roof underside or a single wall run.
Long-term keepers note that the product’s value is in radiant heat reflection rather than deep R-value thermal resistance. The 3mm foam core is not going to perform like 2-inch rigid foam board in a truly extreme cold climate. What it does well is add a reflective layer that reduces heat loss through radiation on roof and wall surfaces, adds a thin buffer against conduction, and does so without adding significant bulk or requiring complex installation. For keepers in moderate cold climates or as a supplement to existing structural insulation, that use case is well matched.
The main installation consideration flagged in owner reviews is gap management. Reflective barriers lose effectiveness where they aren’t sealed at the edges, because cold air can bypass the reflective surface and reduce the performance of the layer. Taking the time to overlap seams and tape or staple edges tight makes a measurable difference. Budget-tier branding does raise reasonable questions about long-term durability in the presence of consistent moisture cycling, which is the exact environment a chicken coop provides every winter. That’s a fair caution, not a deal-breaker.
Check current price on Amazon.
A Buying Guide for Coop Insulation and Winterizing Materials
R-Value and What It Actually Means for a Coop
R-value measures thermal resistance, specifically how well a material slows conductive heat transfer. Higher R-value means slower heat loss through the material itself. For coop insulation, a higher R-value matters most on the roof and north-facing walls, where conductive loss is greatest. Thin reflective products have lower R-values than thick rigid foam boards, but they add reflective performance that pure R-value ratings don’t capture.
Don’t select insulation on R-value alone. A product with moderate R-value that installs flush, stays in place, and doesn’t create a peck hazard will outperform a higher-rated product your birds destroy in the first week. Match the material to your coop’s construction and your climate’s actual demands.
Installation Safety and Pecking Risk
Any insulation material accessible to birds is a potential health risk. Fiberglass batts must be covered. Foam board should be faced with plywood or OSB on the interior side if birds can reach it. Reflective foil products, when stapled flat against framing, are less accessible but still worth monitoring for any lifting edges that curious birds might grab.
For keepers who find their birds unusually destructive inside the coop, rigid foam behind a plywood interior skin is the more durable long-term solution. The extra installation step pays off if you’re not reinstalling insulation every season. Planning your insulation layer into the wall cavity before closing it up, rather than surface-applying after the fact, is worth considering if you’re building or rebuilding. For detailed guidance on how insulation fits into your broader coop equipment and environment planning, the hub section covers these decisions in full context.
Moisture Management Alongside Insulation
Insulation that traps moisture inside the wall cavity or against the coop surface does more harm than no insulation at all. Wet insulation loses thermal performance, promotes rot in wood framing, and can create mold conditions that affect flock respiratory health. In a coop, the moisture source is continuous and significant, not occasional like in a residential wall.
Vapor management in a coop focuses on airflow rather than vapor barriers. Keep upper vents open year-round, even in hard cold. Use bedding management, specifically the deep litter method, to manage floor moisture. Check that any insulation material you install against an exterior wall isn’t trapping condensation between the insulation and the wall surface on cold nights.
Supplemental Heat as a Companion to Insulation
Insulation reduces heat loss, it doesn’t add heat. In climates where temperatures drop well below freezing for extended periods, insulation alone may not be sufficient for cold-sensitive breeds or for keeping water liquid. Supplemental heat becomes part of the winterizing conversation. If you’re evaluating whether your insulation strategy needs a heating component, the chicken coop heater guide covers that decision in depth, including what specs matter and what long-term owners report about performance.
The general principle is that insulation comes first. A well-insulated coop requires less supplemental heat, which reduces fire risk and energy cost. Adding a heat source to a poorly insulated coop is an expensive way to compensate for what better materials would fix at the wall and roof level.
Prioritizing by Climate Zone
Keepers in USDA zones 6 and warmer, where winter lows stay mostly above 10 degrees Fahrenheit, will find that solid construction plus a thin reflective layer and good ventilation management handles most breeds without supplemental heat. Zones 5 and colder, where sustained subzero nights are part of the normal winter, require more attention to wall R-value and are more likely to need supplemental heat for water and for cold-sensitive breeds.
Understand your actual winter baseline, not just the average low. The nights that matter most are the extreme cold events, not the typical cold. Design your insulation strategy for those outlier nights and your coop will handle the average ones without effort.
Frequently Asked Questions
Does reflective insulation actually work in a chicken coop?
Reflective insulation works by bouncing radiant heat back toward the source rather than allowing it to escape through the wall or roof surface. In a coop where your birds generate meaningful body heat, reflecting that warmth back into the space does make a measurable difference. It is not a substitute for structural insulation in extreme climates, but as an added layer on a roof underside or exterior wall, owner reports consistently note improved ambient temperatures. The key is installation with minimal gaps at seams and edges.
How do I insulate a coop without creating a moisture problem?
Keep your upper vents open year-round, even when it’s cold enough that it feels counterproductive. Moisture from respiration and droppings needs an exit, and closing off ventilation to retain heat causes condensation on walls and bedding, which is worse for your birds than cool air. Insulate the walls and roof to slow heat loss, but do not seal the coop as though it were a cooler. The ventilation stays, the drafts at bird level get blocked.
What’s the difference between a draft and ventilation in a coop context?
Ventilation is airflow positioned above your birds, typically near the roofline or through high-placed vents, that removes moisture and ammonia from the coop without moving cold air across the roost. Drafts are airflow at or below roost level, which create wind chill on birds who cannot easily move away from them at night. Good winterizing eliminates low-level gaps and door cracks while protecting, not plugging, the high vents that do the actual air quality work.
Can I use standard household insulation in a chicken coop?
Fiberglass batts and open-cell foam products used in homes are not safe to leave exposed in a coop. Chickens will peck at and ingest them, which is a serious health hazard. If you use fiberglass batts or foam board, cover the interior surface completely with plywood, OSB, or another rigid material that birds cannot peck through. Reflective foil products stapled flat to framing present less risk because the surface doesn’t invite pecking the way soft or foam materials do, though any lifting edge should be secured promptly.
At what temperature do chickens actually need supplemental heat?
Most cold-hardy breeds, including Plymouth Rocks, Wyandottes, and Orpingtons, handle temperatures well below freezing without supplemental heat if the coop is dry and draft-free. The concern is usually water freezing and frostbite on large-combed breeds rather than the birds themselves going hypothermic. Mediterranean breeds with large combs, such as Leghorns, are more vulnerable. A poultry vet is the right resource for guidance on specific flock health thresholds, especially for chicks or recovering birds.
Where to Buy
EconoHome Reflective Insulation - 24in x 10ft, 3mm Foam Core, Aluminum Heat Shield - Light Reflective Insulation forSee EconoHome Reflective Insulation - 24i… on Amazon